

This is Part 1 of my 5 part series sharing my 24 hour #StartupThisSunday cross Asia adventure building the human powered website monitoring service wpFlight.
My #StartupThisSunday trip of building and launching a product in 24 hours really was a spur of the moment decision. I’d had the idea for a no software development knowledge needed automated testing product to open up the power of crowdsourced testing to a less technical audience for a few months, but found myself constantly searching for the right time to get started.
A month or so ago, during one of my weekly GTD[1] review sessions, I considered promoting my "Build automated crowdsourced testing minimal viable product[2] task item from "someday" to one of my "next action" items. I imagined that completing the task would take roughly a week including my normal weekly obligations and ongoing products. However, I felt the dread of impending feature creep and schedule slip that can so easily occur when perfectionist software engineers are building products. I already imagined unplanned events, unforeseen technical problems and the hundreds of tiny details that are the 20% that takes 80% of the time.
I originally planned to create a series of five niche crowdsourced monitoring products similar to wpFlight over the course of five days, but after a couple false starts (ie. I’m going to do five products in five days this week) and discussing the plan with several people I was left unhappy with that plan. As to why I decided against that approach, I’ll save that for another post.
June 14, 2015 - 10:00am: Wake up
I had spent Saturday visiting with fellow South China entrepreneur Mike Michelini and his family at his home in Shenzhen. It was a relaxing day of swimming followed by baby back ribs, fish and chips and tall pints of cider. I woke up the next morning back in Hong Kong with a case of good-food-and-good-company-induced Sunday morning lethargy, so I pulled myself out of bed and headed off to the pool to wake up and plan my Sunday.
Like many tech entrepreneurs, I’m most productive in afternoon, evening and overnight hours. After my late Sunday morning swimming, GTD inbox review and lunch, I noticed that I had no high priority items and could finally get started on creating a MVP of a crowdsourced monitoring product. Having experienced the schedule slip and scope creep of new development projects time and time again, I really wanted to get something done and out in front of users as fast as possible.
The perfect time is now
As life long entrepreneur, I constantly encounter wannabepreneurs…people who say they have an idea and want get started, but they just need time or money or proper alignment of the moon to get started. I know many of the excuses because I’ve made many of themselves - I’ve also been very lucky to have very successful people shout some sense into me early on.
If you’ve decided to do something, now is a great time to get started.
Making a public commitment
I decided while swimming that I wanted to get the wpFlight MVP designed, built and launched today. Post swimming, however, I was still feeling a bit of the Sunday blues. I had slight headache from the night before (I don’t do well with beer or beer-like-products…cider I’m looking at you!) and the sun was shining on another day of perfect Hong Kong summer weather. The idea of sitting around my home office designing, coding and testing for 24 straight hours seemed like a recipe for a nap, followed by another nap, followed by failure. I needed to get out and needed a race to keep me going.
What better way to make a race and get out of the house than traveling somewhere? I decided to create a one man race against the clock by buying a roundtrip ticket from Hong Kong to a nearby country and back. Many of people spend days each week on the road yet complain they never have any time. Yet if you see these same people in airports or train stations, they’re rarely working. Despite the talk of mobile offices and road-warriors, planes and airports are more often a place to take a nap, watch a movie or talk to the person next to you on your employer’s dime. Spend any time in an airport lounge and you’ll see what I mean.
The rules were simple, I would have 24 hours from when I started to buy a ticket, travel to another country and back all while designing and building a new product that would be launched at the end of the time period.
I was worried about going forward with this plan. The idea of making a public commitment to do something I had never done before was risky. I had a pretty idea of what I wanted to build and was familiar with all of the tools I would use to build it, but what if I couldn’t finish it? How would people react? Would people think I’m just screwing around?
In the end, I decided that any reaction from people was better than the most likely case, that no one would even notice. I also took discomfort of going through with this public process as a positive indication that it was something I should do even if the only thing it did was push me outside of my comfort zone
Building a product is not building a business
It's very easy for someone with an engineering background such as myself to confuse building a product with building a business. It's so easy for a week building a product to turn into a few weeks which then turns into fews months...all without focusing on the core essence of a business, solving customer problems. That's why I thought it would so valuable to timebox building the MVP of the wpFlight from first code to launch to 24 hours. No feature creep, no distractions from shiny new engineering tools, no premature optimization. Build and launch in 24 hours...no excuses.
3:00pm: False start
I decided on this plan a few minutes before 3pm on Sunday. 3pm would have been the perfect time to start the journey since 3pm Sunday is exactly midnight on the West Coast US. Unfortunately, I’m not the fastest writer, so it took me longer than it should have to write my announcement blog post. Instead, I posted my public commitment at 4pm and got started.
4:00pm: And we're off!
I'm building a new product in 24 hours - starting now - while on the road. #StartupThisSunday Join me for the ride! https://t.co/loOjTvJ0nt
— Larry Salibra (@larrysalibra) June 14, 2015
My first step was to quickly find and purchase a reasonably priced roundtrip plane ticket leaving that evening and returning the next day. Tools like Expedia and Kayak are great if you know where you’re going, however they completely fail when your destination is simply “anywhere but here.” Fortunately, there are a couple great tools specifically designed for those of us who aren’t particular about destination. My favorite is Adioso which lets you search for flights to anywhere and is beautifully designed. Result show up in a beautiful grid of destinations and lowest prices.[3]
Excluding destinations in mainland China since they’re technically the same country as Hong Kong and Taipei (because it’s too close by to be interesting for this), Singapore, Philippines and Thailand usually top the list of cheap countries to fly to from Hong Kong. For this adventure, Singapore was the cheapest and had flights that fit into my schedule. United Airlines has a flight that originates in Chicago and continues on to Singapore after a stop in Hong Kong. This is a great flight for many reasons. The schedule let’s you leave Hong Kong late in the evening, arrive in Singapore around midnight, spend the night in Singapore and arrive back in Hong Kong around the start of the next business day. It’s also cheap because they want to fill up the empty Singapore to Hong Kong seats left when people are only traveling between Hong Kong and Chicago.
I checked the official airline site and the same price, US$166.90, was available on their site. It briefly warned me that that I would not be able to purchase a same day ticket with a Hong Kong-issued credit card. I’m not sure what their reason for that is, but no matter, Hong Kong credit cards are relatively bad deals compared to US cards, so I wouldn’t be using one anyways.
Just bought a roundtrip ticket Hong Kong to Singapore - it's real! let's do this! #StartupThisSunday pic.twitter.com/ucenKrKySz
— Larry Salibra (@larrysalibra) June 14, 2015
Buying the ticket took me only about 8 minutes the only trouble came from United’s creaky old website that they inherited from their Continental merger. Like Adioso, it doesn’t use industry https encryption properly and Safari warns you that searching for a flight on their encrypted page sends data in an insecure method negating the value of their encryption.
I always print a copy of my ticket receipt when I’m traveling outside of the US - too often immigration officials will want to see your “ticket” and won’t be impressed by something on your mobile phone. After printing the receipt, I threw a few items into my [trusty gray L.L. Bean Stowaway Daypack][4]. 13 inch Macbook Pro Retina, JayBird BlueBud bluetooth headphones, two external batteries (all charged of course), a hooded sweatshirt & winter hat (to protect against aggressive air conditioning), passports, wallets[5], contact solution, a toothbrush and toothpaste.
I left home and rushed over to catch the airport bus which is roughly a 15 minute walk away. The walk was a great time to start to think through how I would plan the next 24 hours.
This is how I thought about the next 24 hours. My flight to Singapore would leave in four and a half hours and take a bit less than four hours. I would have five hours of time in Singapore before another four flight back to Hong Kong. This left me four built in milestones and five blocks of time I could use to further timebox tasks and check my progress. I also assumed that I wouldn’t have Internet access on the plane, so I would need to further arrange tasks so that work that could be done without Internet could be done grouped together and assigned to one of the two flights.
Made it to airport bus E33 - mobile office number 1 - will do planning for the next 23.5 hours #StartupThisSunday pic.twitter.com/M8yyXfoVXe
— Larry Salibra (@larrysalibra) June 14, 2015
4:31pm: On the bus, Airport-bound
Once I boarded the bus, my first step was to flesh out a generic create new website Omnifocus project task list I had previously created. I’d created this list to remind myself of the various social media and third party services one needs to register for when setting up a new domain. Once I came up with a plan, I would complete the boilerplate work.
Thinking about rapid MVP development
When thinking about how to build and launch a product as quickly as possible, it is important to pick tools you are already familiar with and avoid anything that has a lead or turnaround time. Working under a 24 hour time constraint, unless you already have team members with you and ready to go or an Odesk staff that you’ve used before, you’re going to be doing everything yourself. Most of the excellent tools and services that let entrepreneurs outsource or enlist the on-demand assistance of remote experts have at minimum a lead time in the hours or more to get going.
Even if you have a team member you’ve worked with for years, the two of you never share the exact same vision out the door. It may be one person has a vision that gets communicated to the other person or the two of you have different ideas and discussion arrives upon a common vision. This applies for both product vision and the vision for how to implement the product. This back and forth can be great, but it’s easy for that back and forth to take what one person could do in a day and extend it out to days or weeks with theoretical discussions about things that may or may not happen. By timeboxing your MVP into 24 hours, you’ll have plenty of time to have these discussions while you’re seeing how the market reacts to your initial ideas.
Selecting my tools
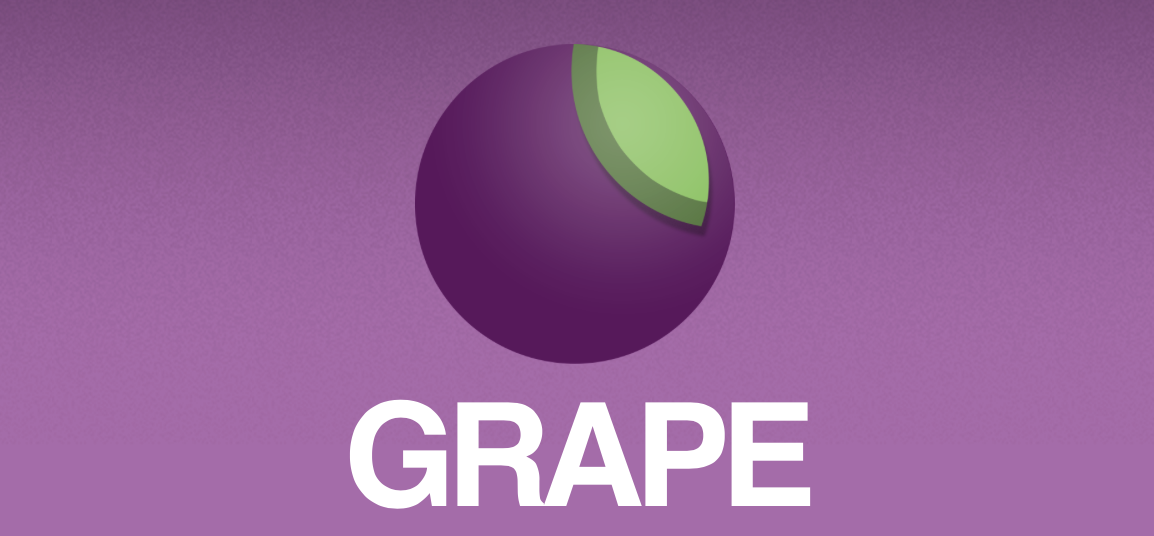
Since I’ve been building and leading teams that build software for much of my adult life, it made sense for me to pick programming languages and developer tools to create this MVP. For me, that meant picking the Ruby-based API creation framework Grape, Stripe for payment processing and AngularJS in the browser. For the site and templating, I’d use the Jekyll static website generating framework and the same custom scripts I use to build and deploy my blog. This would let me keep the site entirely static and avoid moving parts which would allow it to be completely cached by and served from Cloudflare. I could also get away with using the same US$5/month DigitalOcean server I used for this blog.
If I was a non-technical founder, I could considered tools like Shopify, Squarespace, Google Forms or WuFoo that don’t require programming knowledge and allow you to replicate much of the user visible functionality.
For wpFlight, I was going to be building it as a service that sits on top of our existing Pay4Bugs service, however I wanted to avoid time consuming and complicated API integration until we were sure this is something that customers want.
My rough plan was to complete this boilerplate on the hour bus ride and plan out the rest of the work among the five time blocks.
Boilerplate
I already knew what the service would do and who it would target. It would let customers monitor their site with real people to let them know when something critical stopped working. I decided to focus on Wordpress users because companies who use Wordpress are demanding of their websites yet often don’t have formal software engineering training or a defined testing process. Despite the focus on Wordpress, the service would work for any marketing or ecommerce site.
Prior to starting #StartupThisSunday, I had given some thought to what I would call the service. I found the [method and spreadsheet suggested by 7-day-startup][6] useful in brainstorming names and came up with five choices.
- funnelguard
- wpflight
- successflight
- solidflight
- flyblast
wpflight.com was my favorite both because of its simplicity and of the social indicator "wp" which shows this product works great with Wordpress. Your business website is a lot like flying an airplane. You want it to get off the ground safely and to go fast, but the number one rule is that it should not fall out of the sky.
Plowing through the boilerplate stuff was quick and easy. I bought the domain through Google’s new domain registration service, added it to Cloudflare, registered social media accounts and created a new Github repository.
To save time, I pointed the wpFlight support email to our existing Pay4Bugs Groove powered ticketing system. Groove makes it super easy to add another email box so we could keep wpFlight tickets separate from our Pay4Bugs tickets yet handle them as part of one support process.
The trickiest thing of the whole process was making sure the anti-spam DKIM and SPF DNS records were set up properly for all of the services that will be sending email using your domain. Messing this up means that email meant for customer will end up going straight to their junk box. I quickly tested this by sending test emails to an external domain and manually verifying the message headers to make sure SPF and DKIM verification was passing.

After setting email, I could move on to setting up a new Github repository. I would be using the git version control system for this project. Version control makes it possible for me to keep track of the changes that I make to code and quickly revert to an earlier version of code if a problem occurs.
On ~50 min bus ride to HKG finished boilerplate stuff - using Omnifocus + #GTD to keep organized #StartupThisSunday pic.twitter.com/EnprsZmcDt
— Larry Salibra (@larrysalibra) June 14, 2015
5:18pm: Planning the rest of the journey
Next, I came up with my development plan for the rest of the day. The first step was deciding what I wanted to build. I wanted to build a system that let customers submit one or more website URLs and subscribe to a plan where the URLs they submitted would be tested periodically to make sure there were no problem. If there were problems, customers would receive an email report indicating the problem that were found and if there were no problems, they would receive an all clear email.
We would start by doing things that don’t scale and manually running each test on the Pay4Bugs platform. However, we needed a system that let customers sign up and pay for the service on their own.
To do that, I needed to build a system to collect the following information:
- Contact info
- URL(s) to be tested
- Payment info
- Service plan
This information would need to be stored in a way that was accessible to the people doing support and running the projects who aren't developers. Payment information would also need to be verified, stored and charged periodically for the service subscription.
I could have simply put up a landing page that asks people interested the service to fill out a contact form or simply email us if they’re interested in such a service. I didn’t choose this route for a couple reasons. It’s a bad idea to handle your customers’ payment details directly both because there’s a good chance you’ll lose them and it’s a violation of credit card association rules to do so unless you’re certified PCI compliant at a certain level. I also wanted to make the sign up process as frictionless and easy to use as possible.
My requirement to collect data from customers and also make it available to non-technical internal staff had the potential to really increase complexity in a way that could make it difficult to complete the MVP in 24 hours. If the data only needed to be accessible by me personally or another trusted technical team member, storing the data in database would have been a reasonable option. It’s not that difficult for a programmer to ssh into a server and type in some SQL commands to see whatever data he needs to see.
Non-technical users would have a lot of trouble with that. I would need to create some sort of interface: a set of internal use webpages, for example, so that users could much up customer subscriptions with contact info and websites to be tested. To do that, I’d probably need a user system, with logins and all of that fun stuff, or at the very least, I’d need to set up some whitelist rules so that the whole world couldn’t access customer information. Complicated. With only a bit over 23 hours remaining and no code written, I didn’t have time for more complexity.
Instead, I wanted to come up with a way where I didn’t have to have my own database or user system and complexity that comes with it. There are no shortage of third party services such as Parse or Firebase that allow you to outsource your database through an API, but adding an additional third party dependency increases complexity and I didn’t have time to spend time evaluating the different services and then learn their APIs.
What’s a programming entrepreneur to do? I turned to the developer platform that’s done more for Internet commerce than any company since PayPal, Stripe! Stripe is famous for providing an amazing API and toolkit for collecting and processing customer payment information and an easy to use dashboard to manage those payments. What isn’t well-known is that in a pinch, you can use it as a (time)poor man’s database. Everytime you create a customer or payment, you can optionally store arbitrary key-value data with the record. This data, which Stripe refers to as “metadata” is then visible through its point and click dashboard. This meant that I could store information customers enter about their website directly with their payment information and our non-technical team members could access it. Perfect!
Now that I knew what I wanted to build, I divided up the tasks among the five different time blocks:
- Block 1 - 4:00pm to 8:25pm: Pre-flight: Design and implement backend API
- Block 2 - 8:25pm to 12:20am HKG—SIN flight: Page layout, marketing copy, design
- Block 3 - 12:20am to 6:00am: Singapore stay: Implement client-side page logic and connect to backend
- Block 4 - 6:00am to 9:55am: SIN-HKG flight: Create logo, finalize copy, more layout work
- Block 5 - 9:55am to 4:00pm: Post-trip: Whatever was leftover, testing, launch!
5:44pm: At HKG
Checked in, cleared immigration - heading to gate area to get started on business logic #StartupThisSunday pic.twitter.com/PFkNRKJrF2
— Larry Salibra (@larrysalibra) June 14, 2015
As nice as Hong Kong buses are, after thirty minutes of using my phone or computer as the double-decker bus winds around Hong Kong’s hilly roads, I started feeling motion sick. I took a break for the last fifteen minutes of the ride as the bus, intended more for airport and airline employees than travelers, drove around the airport grounds dropping off and picking workers. The bus ride finally ended at the Terminal 1 departure checkin hall one hour and twenty-five minutes into my adventure.
Check in went quickly except for comments about the brevity of my trip.
“Wow! You’re coming back in the morning!”
“Yep! It’s going to be fun!”
The Hong Kong resident immigration almost never has a line and this time was no different. It went smoothly until I tried to take pictures of the eChannel automated immigration gates (for this blog). An officer make a weak attempt to chase me down and instead gave up and yelled in my direction that I needed to delete them.
I found a seat with a view in a lounge near gate to plug in and get to work. My first step was to create a new Stripe account so that I could get started on the API. For those that haven’t used Stripe before, creating an account is easy. You don’t even need to enter a username or password if you don’t want to save the account. You also don’t need to enter any business or personal info until you’re reading to start accepting live payments. Once you’ve created the account, you’re all set up to build on top of it in the test mode which comes with a handy list of test credit card numbers you can use to simulate payments.
Once that was out of the way I started thinking about how I wanted my API to look. What actions would it need to perform and what information would it need to perform? My goal when thinking about this was to distill the API requirements down to absolute minimum necessary. It was already over two hours into #StartupThisSunday and less than two hours until boarding for my Singapore flight.
Reducing feature scope
One obvious critical action was the ability to place an order or start a subscription. That would require the same information we discussed above:
- Contact info
- URL(s) to be tested
- Payment info
- Service plan
It also seemed like I would want wpFlight to have a mechanism for users to log in and access their account. I’d thought about this aspect of projects in the past. I knew I didn’t want develop this myself. I also didn’t have time to deal with 3rd party login options such as Facebook Connect which are still complicated because they involve users getting redirected off site and back. I’d also thought doing a login by email system that fakes an account management system by using information in Stripe.[6] However, all of these options seemed like more work than necessary for an MVP. Having a way to log in would just make it so that I would have to create ways for people to change their subscriptions. A lot of work for a MVP and feature creep that would definitely make it hard to make our deadline.
Instead, I could avoid all of this hassle by asking customers who bought into wpFlight’s value proposition and signed up to email customer support if they wanted to make changes to their account. Problem solved.
It was settled, I would build an API with exactly one action: creating a subscription.
The next step was outline the API call. I like to do this with pseudo code and comments, writing a comment for each step I think will need to be taken.
{% highlight ruby %}
post "order" do
validate input
create stripe subscription
send welcome email
end
{% endhighlight %}
Collecting customer information
Next, I would need to think about the information we already have decided to collect from customers and action that the API call will take and how we will get that information from the webpage to the API.
Contact info
Contact info can simply be an email address. We might collect this with a type=email input field on the client side or perhaps we can have Stripe’s Checkout payment code collect it. Either way, we can send to the API as a String.
URLs to be tested
Initially, I wanted to collect multiple website addresses from customers, but given our time constraints, it seemed like this added unnecessary complexity. Instead, we would simply collect one URL from the customer and pass that as a String to the API.
Payment Info
Stripe has an amazing javascript library that called Checkout that makes it easy to collect a customer’s credit card information in a way that allows you to avoid having to touch sensitive information. It also allows you to avoid spending time creating complicated payment entry forms with only a couple of lines of Javascript. Since we’ve used this before, I knew that it would provide a token, essentially a serious of random looking letters and numbers, that we could send to the API as a String and use to start the customer’s subscription.
Creating new @Stripe account so I can start on API - going to cheat & use Stripe as a database. #StartupThisSunday pic.twitter.com/v7tgAku9HI
— Larry Salibra (@larrysalibra) June 14, 2015
Service Plan
I would assign each service plan a short name and send that code to the API to let it know which plan the customer had selected.
After creating the API signature, I would need to decide where to put this code. I could create a new server for this one API action, but this would create extra deployment work. Instead, it made since to add this the existing Pay4Bugs API which also is written in Grape and already has the appropriate Stripe code.
Writing up the API code and making sure it worked in Stripe’s test mode went pretty quickly. The biggest challenge was figuring out how to send a different secret key than the default key with Stripe's Ruby library for each request since I would be including this in an already deployed project. Stripe's documentation was vague about the proper syntax, but a few minutes of browsing the library source code and trial and error gave me the correct answer. I finished with a few minutes before boarding and could get a head start on my upcoming inflight design tasks by picking a template.
Picking a template
I’m a huge fan of the importance of design. That’s why I’m so excited about the thousands of amazing free templates that are available on the Internet. They are perfect for putting together an MVP or as a starting place for a custom design. They let people like myself with little artistic ability come up with something that is unique and looks great with very little work.
When selecting templates for #StartupThisSunday, I considered templates that were built in ways that would be easy for me to work with and according to conventions with which I am familiar. In this case, this meant looking at templates based on Bootstrap. By sticking to templates based on Bootstrap, I could almost eliminate the time that would be spent trying to understand how the author has structured the template when I wanted to make changes.
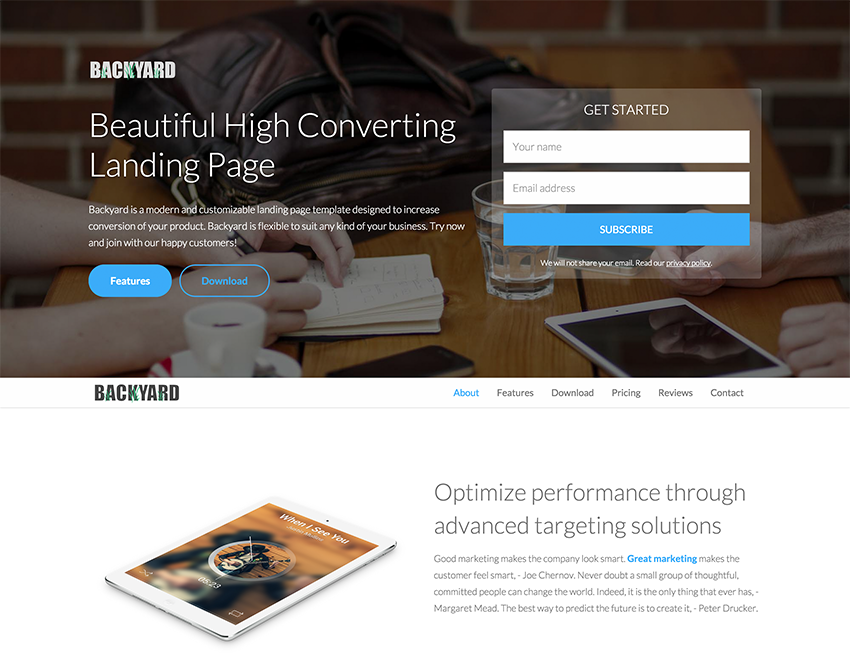
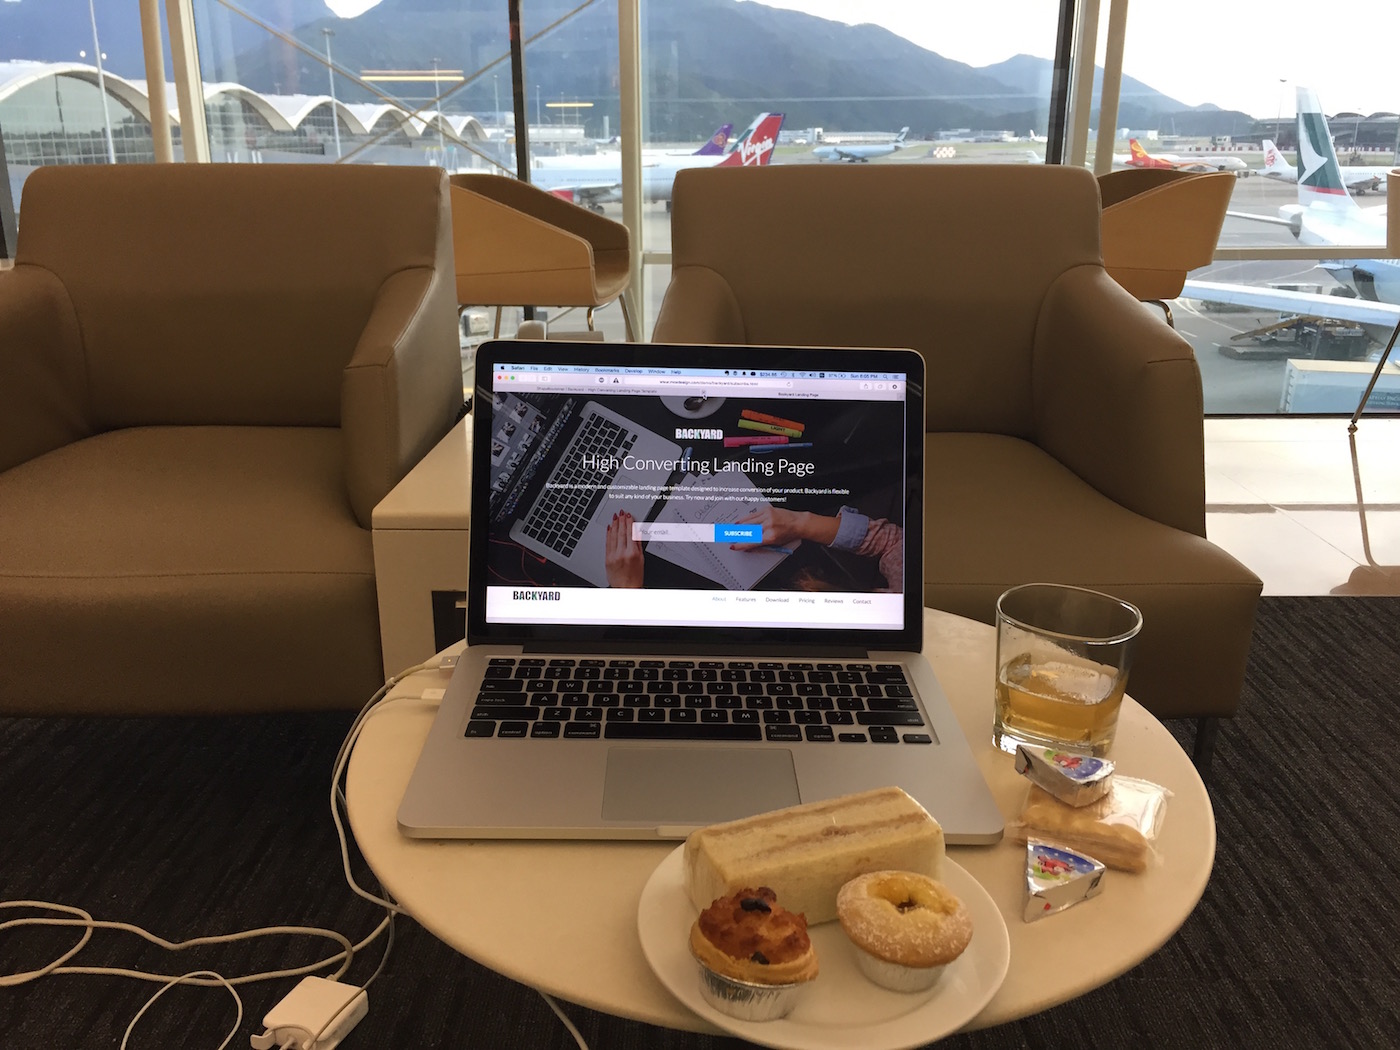
When I'm building a project on my own, I like to pick templates that make heavy use of background photographs. I am a better photographer than I am graphic artist which makes it easy for me to change the way a page looks using photographs I’ve taken instead of having to try to draw myself. For wpFlight, I selected the Backyard template.
8:00pm: Off to catch my flight
I'd made a great amount of progress in a mere 4 hours since getting started. Now it was time for me to pack up my (fully charged) things and rush off to the gate to catch my flight to Singapore.
API & payments working - picked a template and going into marketing copy mode for 4 hour flight to Singapore #StartupThisSunday <20h 2go
— Larry Salibra (@larrysalibra) June 14, 2015
US airlines have secondary security check even on a flight that's 100% outside USA - why? #StartupThisSunday pic.twitter.com/q1sTj0i5jX
— Larry Salibra (@larrysalibra) June 14, 2015
If you made it this far, thanks so much for joining me on Part 1 of my 5 part series sharing my 24 hour #StartupThisSunday cross Asia adventure building the website monitoring service wpFlight. Something you'd do differently? Let me know in the comments or hit me up on Twitter!
Continue reading Part 2 - Singapore-bound
GTD is a personal productivity system called Getting Things Done. Things that you haven't committed to doing but may want to do some day in the future get put into a "Someday" category. ↩︎
Minimal viable product ↩︎
My only complaint is that their site isn’t great for privacy because it doesn’t use encrypted https by default so my searches are visible to anyone who bothers to look. ↩︎
I bought this backpack in 2009 in Guangzhou for around 200 CNY at an L.L.Bean in mall store and killed it after a couple years of heavy use. I shipped it off to Maine via Hong Kong Post’s super cheap (and super slow) surface mail and the kind folks at L.L.Bean happily honored their lifetime warranty and sent me a new bag at their cost. ↩︎
I like carrying as few things in my pockets as necessary, so I keep separate wallets for China and traveling. The China wallet is always stocked with Chinese Yuan and Renminbi denominated credit cards and bank cards. The travel wallet is where I store whatever leftover local currency I have when I leave a country. People laugh at me for carrying dozens of currencies when I travel, but it has saved me and my travel buddies more than once when last minute travel decisions left us needing certain currencies to pay cash for visas on arrival. ↩︎
Expert programming buddy Peter Compernolle confirmed that he’s seen this done before. You can use the Stripe customer ID as a password recovery token. Not very secure, but if your goal is appearance, it works. ↩︎